Camera Setup Guides
Setting up a wireless camera requires users to undergo a process that can be intimidating to many people. As such, we have spent countless hours assisting users on many different platforms and are very familiar with identifying and solving common problems that people run into. Through this experience, we have improved ITP to resolve as many of those issues as possible - however there are aspects that it alone cannot address. As such, we have prepared these documents for several common setups and platforms to help provide new users with a step-by-step illustrated guide to getting their wireless transmitter up and running.
In addition, the guides provide a detailed troubleshooting section to help users identify many issues that might come up during the process. The issues covered in this section represent the most common problems that people have come to us with in the past, so in many cases they may help you to overcome problems that you run into. If for any reason you are still unable to get your camera functioning after following these steps, feel free to contact us and we will be more than happy to help resolve your problems!
In order to identify the guide that is most relevant to your needs, please select the type of network configuration that you would like to use:
|
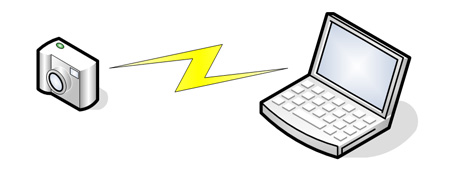
Ad-Hoc (Camera to Computer) - Allows the camera to connect directly to
your computer without the need for an access point. The advantage to this mode is that you will not need any
equipment other than the camera and laptop to make the connection, so this is the easiest way to use a wireless
transmitter when out in the field. The downside, however, is that 802.11g transmitters such as the Nikon WT-2
and Canon WFT-E1 will only opperate at 802.11b speeds (11mbps vs. 54mbps) when in this mode.
|
|
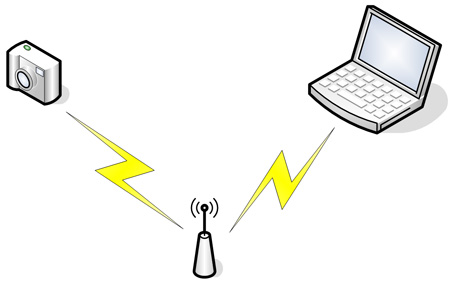
Infrastructure - In this mode, the camera will connect
to a wireless access point/router instead of connecting directly to your computer. This creates a more
stable network and allows 802.11g transmitters to operate at full speed. The disadvantage, however, is
that it requires you to set up and manage an additional piece of equipment. For photographers who will
be working in a fixed area this is the easiest choice, however it can be an issue for those working in
the field.
|
|
If you are still not sure which network type will be better for your situation, please see the above link to further examine the best selection. |
These documents are protected by Canadian copyright law and may not be reproduced without the explicit consent of their author. TCP/IP networking can be a complex topic and no single setup will work in all situations. These directions assume a standard configuration and may not function under special circumstances. As such, this document is provided as-is without warrantee - by following these directions the reader accepts all responsibility for their actions. The author does not accept any responsibility for problems that may occur while following these directions.